
Kết quả 1 đến 1 của 1
Chủ đề: How to fix cracked coconut bowl?
-
08-08-2023, 02:16 PM #1
 Silver member
- Ngày tham gia
- Jul 2023
- Bài viết
- 129
How to fix cracked coconut bowl?
How to fix cracked coconut bowl?
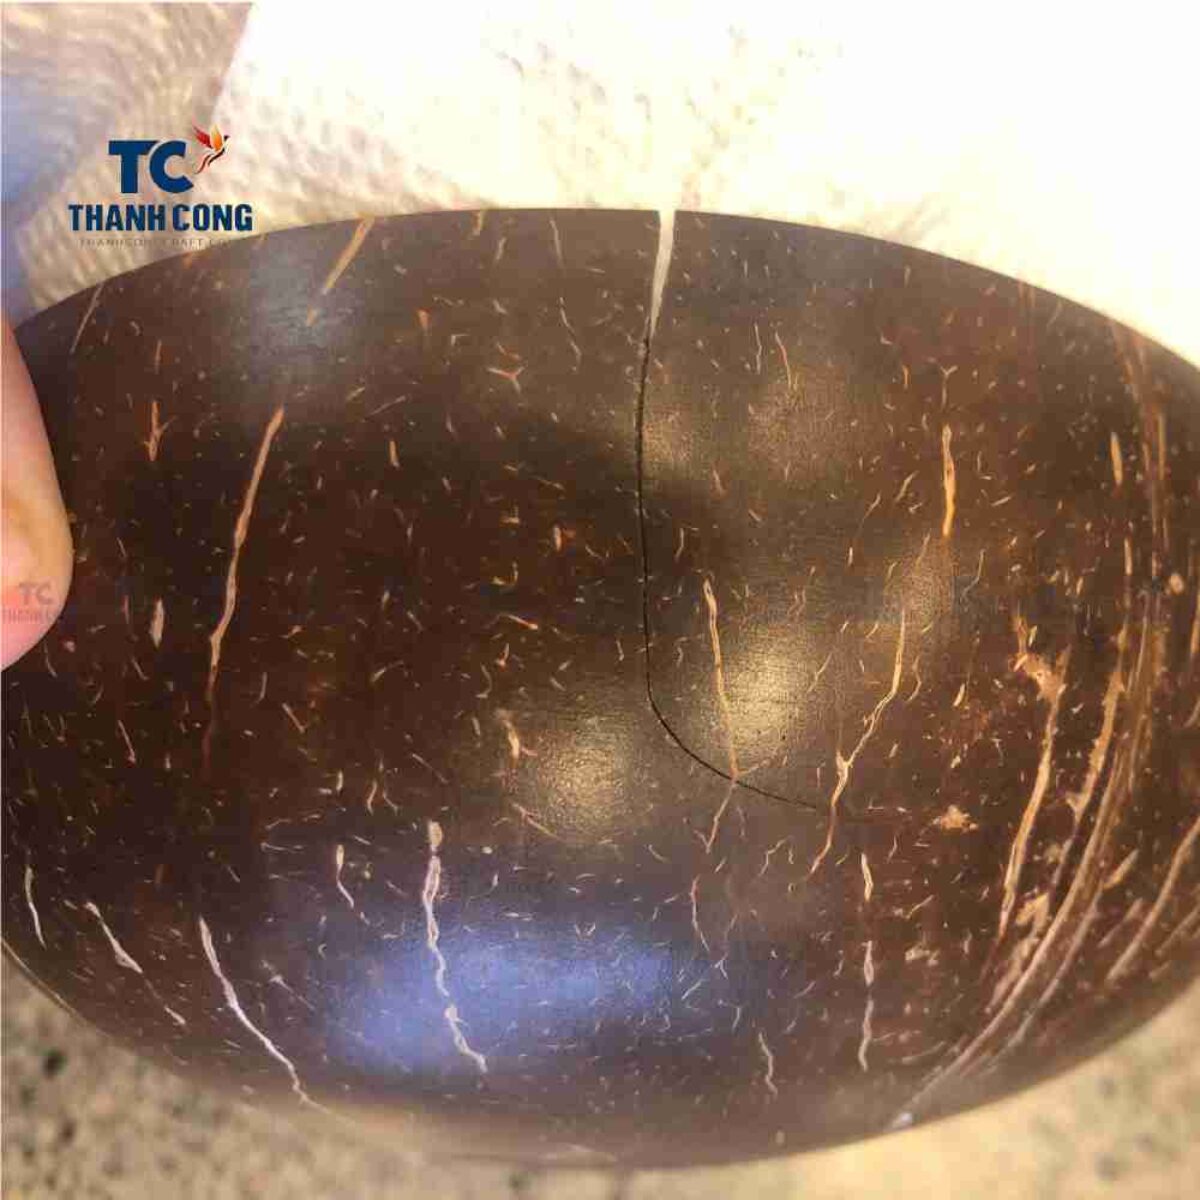
How to fix cracked coconut bowl? Fixing a cracked coconut bowl can be a bit challenging, as coconut shells are natural materials and don't behave like conventional materials.
However, here are a few steps you can try to repair a cracked coconut bowl:
Materials you'll need:- Epoxy resin adhesive (food-safe if possible)
- Sandpaper (various grits)
- Clean cloth
- Clamps or rubber bands
- Disposable gloves
- Mixing container and stir stick (if epoxy requires mixing)
- Toothpick or small applicator
Steps:
Clean the cracked area: Before starting any repairs, make sure the cracked area is clean and free of debris. You can use a damp cloth to wipe away any loose particles.
Assess the crack: Depending on the size and nature of the crack, you may need to take different approaches. If the crack is small and doesn't affect the structural integrity of the bowl, you might not need to fix it at all.
Epoxy resin adhesive: If the crack needs repair, epoxy resin adhesive is a good option. Look for a food-safe epoxy if you plan to use the bowl for eating. Make sure to read the manufacturer's instructions on the epoxy you choose.
Sand the edges: Use sandpaper to gently sand the edges of the crack. This will create a better surface for the epoxy to adhere to.
Mix epoxy: If your epoxy requires mixing, follow the instructions to mix the resin and hardener in the specified proportions. Mix only the amount you'll need for the repair, as epoxy sets quickly.
Apply epoxy: Use a toothpick or a small applicator to carefully apply a thin layer of epoxy along the crack. Press the edges of the crack together, so the epoxy fills the gap. If the crack is wide, you might need to use clamps or rubber bands to hold the edges in place while the epoxy cures. Make sure the epoxy doesn't seep into the inside of the bowl.
Curing: Allow the epoxy to cure as per the manufacturer's instructions. This might take several hours or more. Keep the bowl in a well-ventilated area while it cures.
Sand and finish: Once the epoxy is fully cured, use sandpaper to smooth down any rough edges or excess epoxy. Start with a coarse grit and gradually work your way to finer grits for a smooth finish.
Clean and use: After sanding, wipe down the bowl to remove any sanding residue. If you've used food-safe epoxy, your coconut bowl should be safe to use again. However, avoid using the bowl for hot liquids or subjecting it to extreme temperatures.
Remember that while repairing a cracked coconut bowl is possible, it might not be as strong as the original and could still be prone to future cracks. It's always a good idea to handle your coconut bowl with care to prevent further damage.
See more:
coconut bowl set
Bamboo Hanging Fruit BasketView more random threads:
- Mẫu thiết kế nội thất tối giản đẹp
- Xu hướng chọn mẫu kệ tivi đơn giản của các gia đình hiện đại
- Đại lý chuyên cung cấp các sản phẩm phòng xông hơi khô
- Mẫu bàn ghế cafe nhựa giả mây hiện đại đa dạng mẫu mã
- Sàn gỗ là vật liệu lát sàn tân tiến nhất hiện nay
- Bếp từ là gì, Nguyên lý hoạt động của bếp từ
- Bạn cần những sự lựa chọn mái hiên lý tưởng cho ngôi nhà bạn lợi cho bạn
- Nội thất phòng khách mang phong cách của chính gia chủ
- Những Tiêu Chuẩn Khác Khi Chọn Chiều Cao Ghế Quầy Bar
- Tắm bằng vòi sen đứng có tốt cho sức khỏe

 Trả lời kèm Trích dẫn
Các Chủ đề tương tự
-
Uses of Coconut Husk and Coconut Fibre
Bởi Thanhcongcraft trong diễn đàn Nội Ngoại ThấtTrả lời: 0Bài viết cuối: 07-21-2023, 03:10 PM


"Cậu nhỏ" của đàn ông Việt thuộc...
Hôm nay, 06:55 PM in Rao vặt tổng hợp